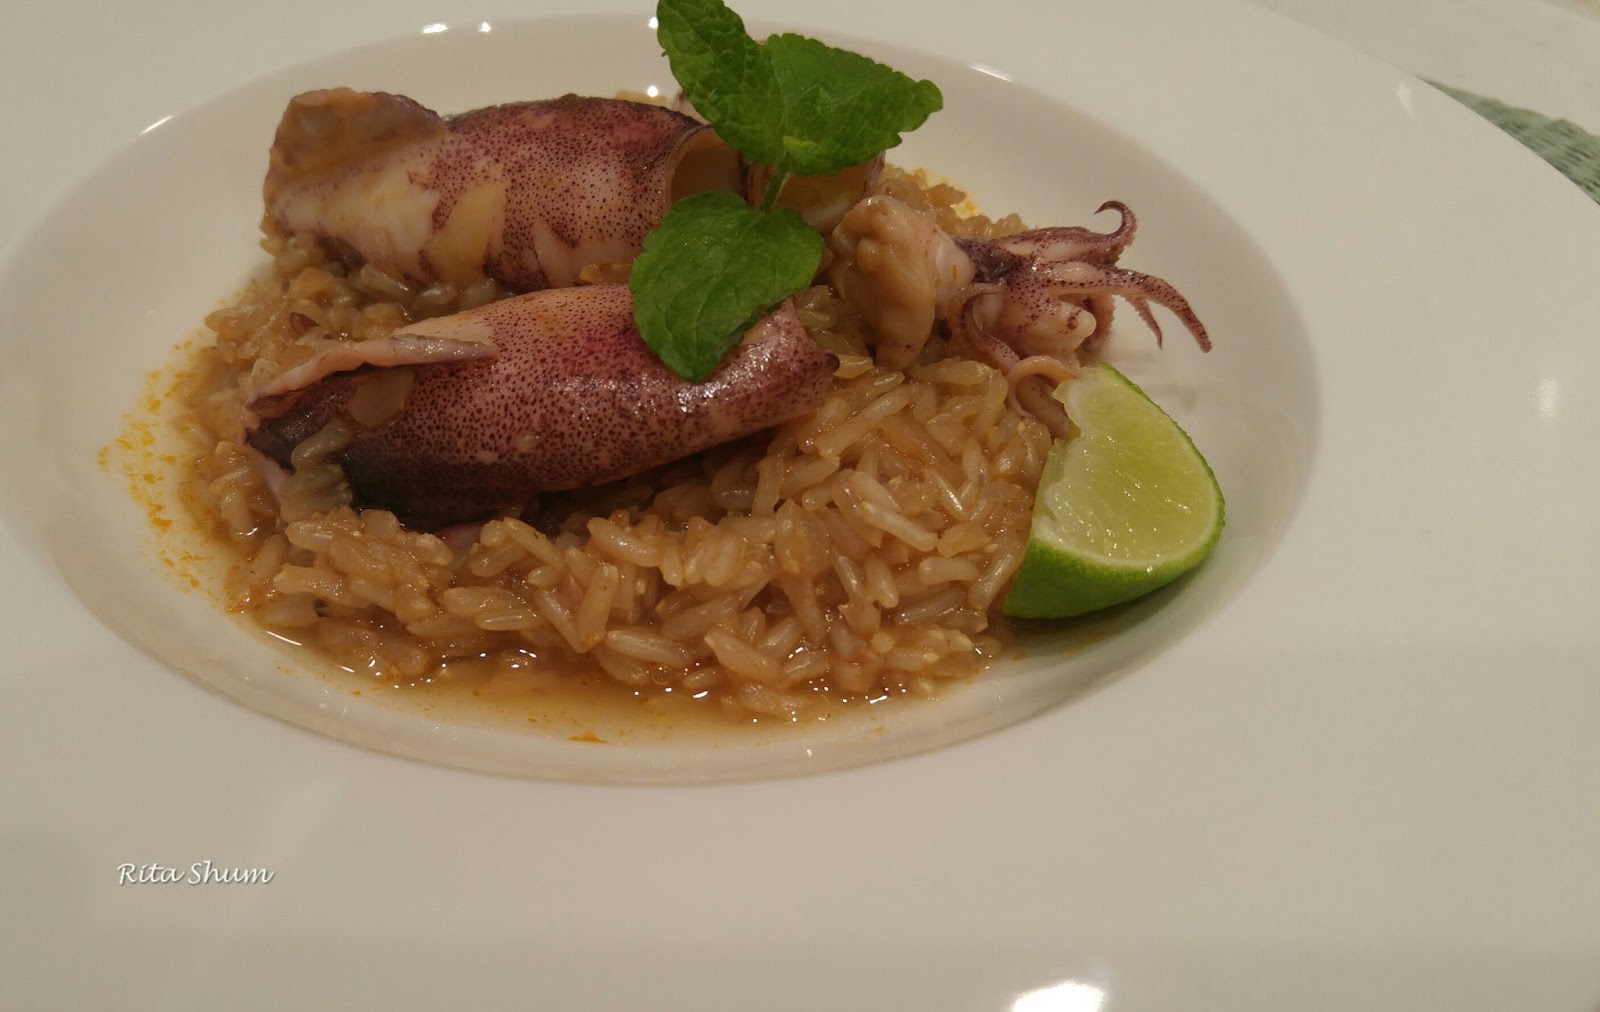
冬陰功食譜時時都受歡迎。加入新鮮香料煮出芳香的味道。在泰國餐廳, 除冬陰功湯外, 湯粉轉冬陰功湯底是很普遍。大部分泰國食譜書的冬陰功只有香料, 即香茅, 辣椒, 青檸葉, 南薑, 乾蔥頭, 甚至蒜和芫荽。辣椒往往用上10-20隻, 不切開。要濃味, 可把煮出香氣的湯加入現成冬陰功醬。
試過幾款冬陰功醬, 包括受歡迎的“藍象”。個人認為九龍城“同心”賣那瓶味道不錯。其他香料也不一定在九龍城購入。部份街市泰國印尼舖有售, 當然最方便是到超市買一包泰國入口的冬陰功料。食譜中魷魚仔夠鮮甜, 轉用新鮮帶子, 海蝦, 蟹和魚塊也配襯。
叫燴飯即是有湯,帶濕的。與risotto相似, 由生米炒成熟, 有綿綿黏口感。食譜使用泰國Jasmine糙米, 本身有陣香味。雖不及意大利米肥, 卻有肥米的嚼口。很不錯的組合呀!有一㸃要注意, 糙米需要煮的時間較耐, 另預先準備的冬陰功湯不宜太濃。因在煮米的過程中再會把湯煮濃一些呢!
材料(3人份量):
1. 泰國冬陰功香料包 1份 (香茅, 辣椒, 乾蔥頭, 南薑, 青檸葉, 青檸), 另加多2支香茅
2. 冬陰功醬 1-1.5湯匙
3. 泰國糙米 1.5杯
4. 油
5. 魷魚仔不切開, 只拔出頭備用
6. 水 約 1.5L
把冬陰功香料包, 洗淨, 青檸抽出備用。 南薑切片。香茅,乾蔥頭拍扁, 辣椒可增加或減少(想更辣, 把部分辣椒切開), 青檸葉保留兩片備用。落油,略爆材料,加水, 中火煮25分鐘出味, 之後加入1-1.5湯匙冬陰功醬及餘下青檸葉。煮多5分鐘。熄火, 加入一個青檸汁調味
落多一㸃油, 放入米, 略炒, 讓米身佔上油
每次加入約半碗冬陰功湯, 炒勻蓋上, 約幾分鐘打開蓋。重複, 用細火把米煮熟但要保留一㸃口感。若湯不夠可加入熱水。大約煮半小時
在最後一次加湯時, 把魷魚仔放上, 蓋上, 多煮幾分鐘
開蓋, 攪勻, 熄火, 焗住10分鐘
有需要可滴上青檸汁調味或多一㸃冬陰功湯。很好味的冬陰功燴飯。夠鮮味的魷魚仔應記一功!
Ingredients for 3:
1 Pack of Tom Yum spice plus 2 more stalks of lemongrass (lemongrass, shallot, galangal, kaffir lime leaves, chili). All pressed
1-1.5 tbspTom Yum Kung paste
1.5 cups Jasmine brown rice
Cooking oil
Around 10 pcs Sqiud (head off, reserve)
Around 1.5L water
Directions:
1. Boil the Tum Yum Kung spice pack except the lime and 2 pieces of Kaffir lime leaves in medium heat for 20 mins. Add the remaining kaffir lime and 1-1.5 tablespoons of Tom Yum Kung paste, cook 5 mins more. Season with 1 lime juice.
2. Add oil into a saucepan, fry the rice until oil coated.
3. Add 1/2 bowl of Tom Yum soup each time, stir and cover for a few mins or until the soup has been absorbed by the rice. Repeat until the rice is done but aldente.
4. When adding the last round of soup in the rice, place the squid on it, cover to cook a few mins.
5. Open the lid, stir to mix well. Cover again, off heat, let the rice and squid in the saucepan for further 10 mins. Serve hot, season with extra lime juice if necessary


0 comments:
Post a Comment